DRAINS: installation
There are various ways to cut drains. You can saw them or angle grind them. You can get a heavy duty pipe cutter. A pipe cutter for drains is basically a large levered chain that goes round the pipe and chomps through it in one hit. When the time came I opted for my 9" grinder. It went through both ends without any shattering and left clean cuts for my connectors. Cutting the pipe was left to the last possible moment when everything else was in place. I think I can safely say that cutting the old drains was the single most terrifying task of the whole project.
 July 2008: The cut pipe at the bottom of the new drain.
Once the trenches were dug, assembling the drains was very easy. Everything just slots together. You use a spray on lubricant and just slide the pieces together. The inspection chambers have caps to fit over the junction points that you aren't using and there are joining pieces for the long runs of pipe. The only thing you need to cut are the various bits of pipe. I just used a hand saw and cleaned them them off with sandpaper. It's important to make sure the cuts are square so the the pipes fit snugly into the fittings.
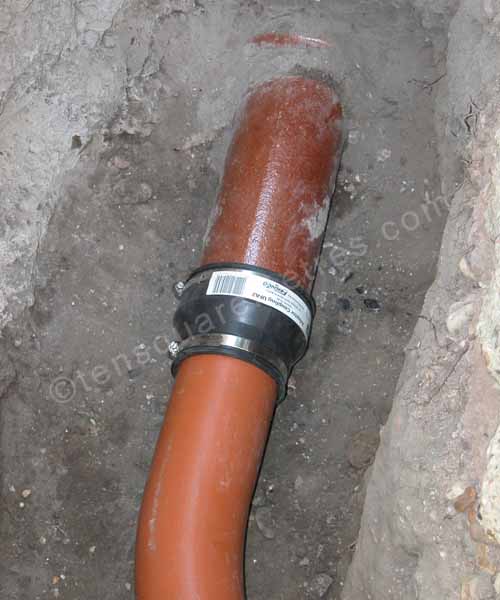
A couple of awkward non-standard joins needed universal bends. These rotate to make whatever angle you need. The connections to the original cut pipes are made using flexible rubber connectors. These were also fairly easy to fit. They have what are best described as giant jubilee clips to seal them in place. It was quite a relief to get everything connected back together. I ran a bath full of water through to see if everything seemed to flow OK. Once I was happy that it all worked without leaks it got it's first test with, er, solids...
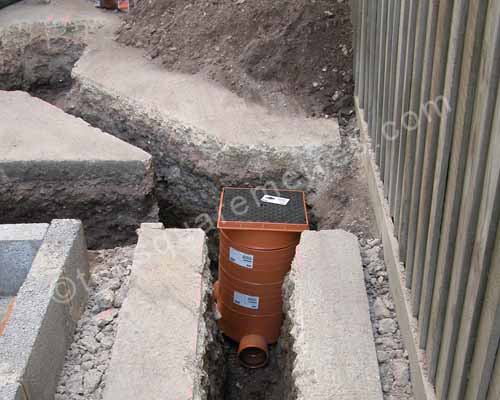
 July 2008: The circular sections of the inspection chambers stack up to create the required depth. The lid is rated for driveway use.
 July 2008: The join at the top.
If you have found this website useful please tweet / like / etc... and pass it on!
© 2010- tensquaremetres.com | Privacy | Search | Contact | About