KITCHEN: floorboards
The floorboards themselves eventually proved to be more straightforward than I had initially imagined. This was partly because by the time you get to this point the floor is level and most of the hard work is done. Also, tongue and groove flooring just slots together and looks great. A key piece of equipment for this process was my PortaNailer. PortaNailers are expensive (about £350 from Screwfix) but they are also brilliant. The simple principle is that they allow you to hammer the nails on a ratchet that pops up when the nail is at the correct depth. They are driven in at 45 degrees and stop just below the surface of the tongue. Because this is such a specialist tool, and because they are quite pricey, there is a healthy second hand market for them on Ebay. People tend to buy them, fix their floor, and sell them. It's a bit like hiring but without the time limit. I bought mine for about £160 and I am confident I will get most of that back. The PortaNailer comes with a double sided mallet with a rubber face to tap the boards in. You buy packs of proprietary nails that slot in like staples.
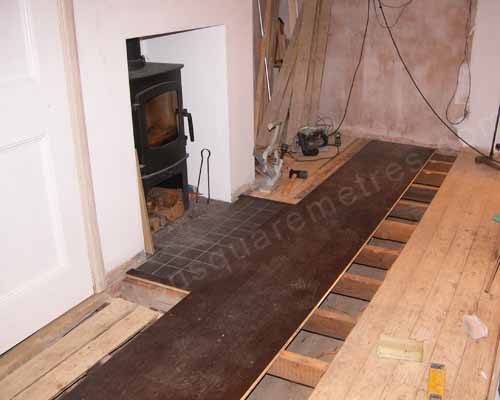 December 2011: We started at the fireplace with a frame round the tiles and worked back across the room. Then went the other way into the breakfast room.
The only other things you need are a couple of good saws. I had my cross cut saw left over from the roof but I bought a rip saw off Ebay for slicing up the lengths at the edges. A rip saw is a just a circular saw on a small bench. The basic DIY ones do the job. You could do all this with a decent jigsaw if you wanted because the tongue and groove flooring is dressed on all four sides. The only cuts you make will get lost under the skirting boards at the edges.
For the flooring itself there is a huge range out there, from ancient reclaimed rustic oak to clean cut contemporary bleached white pine. Once we had settled on dark oak for the floor the key decision we had to make was to choose between solid or engineered boards. Engineered oak floorboards are constructed with layers of cross laminated birch (or similar) with the top five or six millimetres being oak. They look the same and you can sand them down and restore them if you need to. The key difference is that they are much more stable. Solid boards tend to warp or shrink depending on the local environment. There is a lot of debate about which is best or more appropriate but if you are installing under floor heating then engineered floorboards are a must. Aesthetically we preferred the idea of solid wood but after much deliberation and a large heap of samples we opted for engineered. The consistent advice we were getting was that if it's a kitchen you should use engineered. In fact the advice we were generally getting was that if it's a kitchen don't use wood at all.
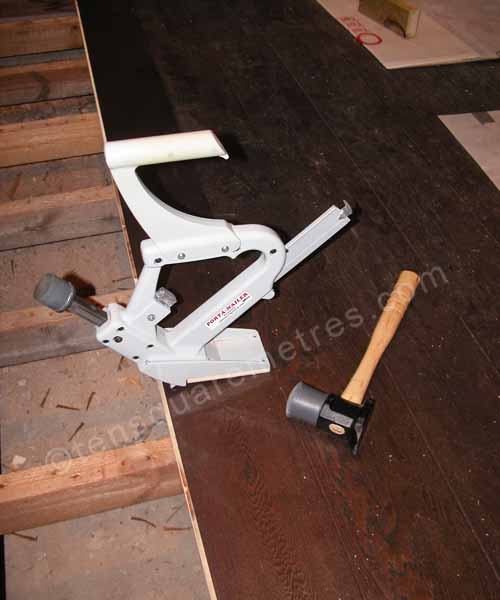 December 2011: A key piece of equipment for the tongue and groove hardwood floor was my PortaNailer.
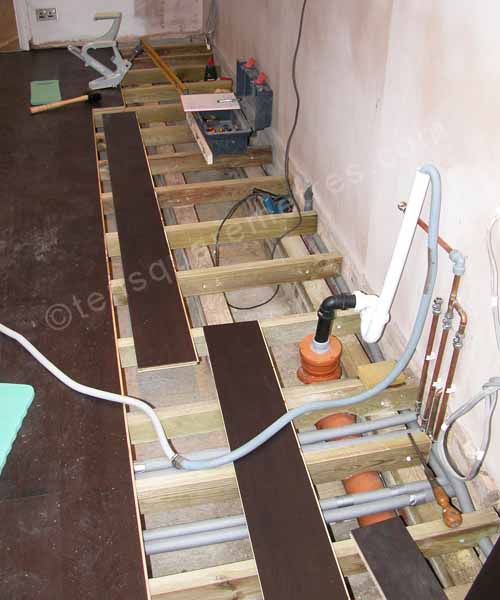
The price was almost exactly the same for solid or engineered. Ours were about £100 per metre and came in two and half metre packs. One thing to check is the lengths. We chose boards that came in 2.2m lengths but quite a lot of these products can have rather short lengths. We also wanted wide 180mm boards. If the lengths are too short the floor can take on a rather tiled look. You also need to consider the type of surface. We went for a slightly distressed 'rustic' finish with a knotty grade of oak. We could have had the same product in a much smoother finish but we wanted an older look to the floor in relation to our 1920s house and stove. The boards have a slight bevel (microbevel) to show the joins. One odd point to bear in mind if you are considering this type of floor is that because it is all interlocking, once it is down it is down. Theoretically you can cut a board out and replace it but this would be very tricky. It is extremely important to make sure you have all your wiring and plumbing correctly installed before nailing the floor down.
It worth taking time to plan the pattern for the boards. We needed to start at the fireplace with a frame round the tiles and then work back. We glued a strip of pine into the the groove at the front edge so we could turn round and work back in the opposite direction into the breakfast room. You can buy these in B&Q. Basically they convert the groove side into a tongue side. As well as planning a random pattern for the joins we graded the boards. They varied enormously from beautiful figuring and knots to almost plain. We wanted to make sure the most interesting oak was where we would see it and keep the grain balanced across the floor. Any rough or damaged boards could be lost under the kitchen cupboards. Our floor area was 30 square metres including the breakfast room so we needed about 33 square metres of flooring. The guideline is to order 10% extra for offcuts. I would say we cut our cloth fairly economically with the floor but we needed every last inch of our 10%.
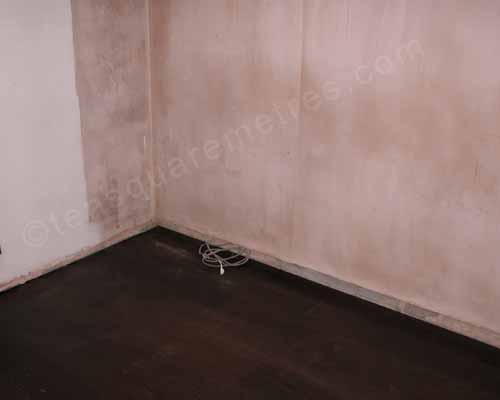
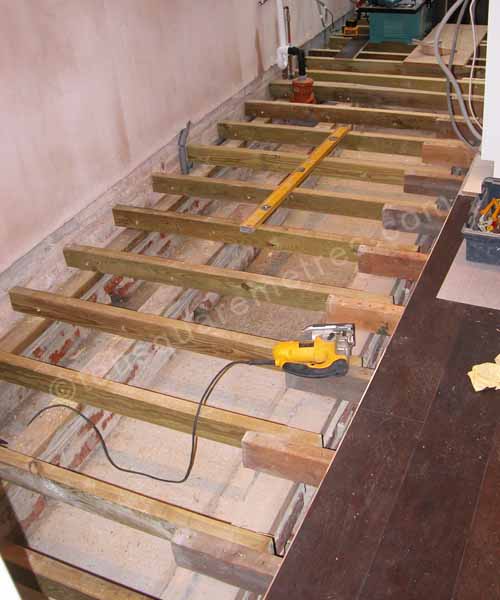 December 2011: The floorboards themselves eventually proved to be more straightforward than I had initially imagined. This was partly because by the time you get to this point the floor is level and most of the hard work is done.
 December 2011: The boards have a slight bevel (microbevel) to show the joins. The ends have this too.
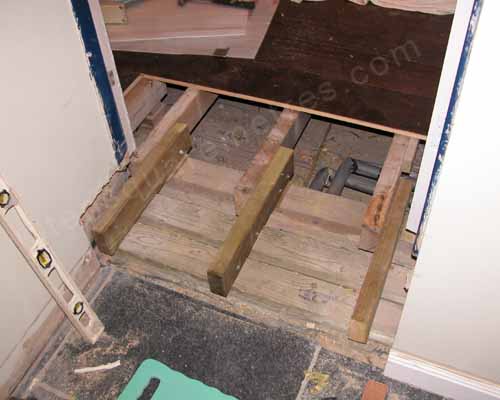 December 2011: This was where the old concrete back door step had been. This now steps down into the utility room.
 December 2011: We graded the boards so we would see the best of the grain. I could lose th worst of the boards along the edge under the kitchen: Graded grain makes finer floor?
If you have found this website useful please tweet / like / etc... and pass it on!
© 2010- tensquaremetres.com | Privacy | Search | Contact | About