GROUNDWORK: concrete floor slab
The prep for the slab was given the OK by Building Control. At this particular inspection there was also a lot of other stuff to discuss. I had various product samples for the walls plus quite a few questions about details of the next stages of the build. I wouldn't be getting another visit until the drains were installed and connected!
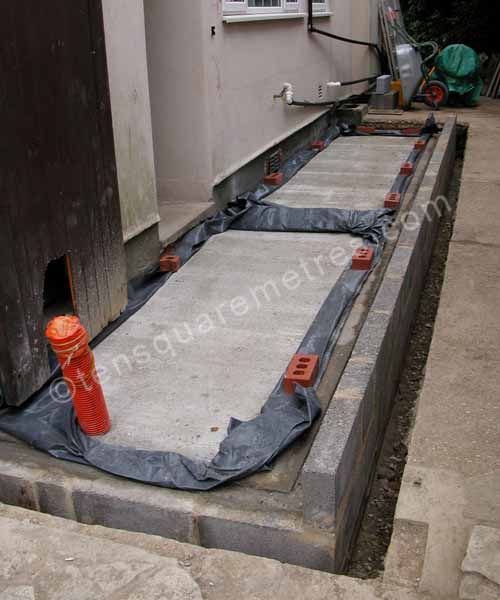
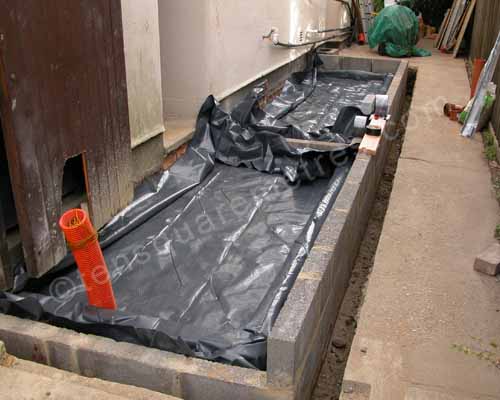 June 2008: The damp proof membrane for the floor slab is istalled ready for inspection by Building Control.
The volume of the floor slab was just under one cubic metre. That's quite a lot of concrete, but I could do it in two sections so I decided to mix this one myself. Compared with the foundation trench it would take much longer to lay, so I wanted to take my time and mix it as I went along.
Working out the quantities of your materials is really important throughout the project. You need to able to order ahead so you can keep working but if, like me, you are very short of storage space, you can't order too much at once. It is particularly important for concreting. You just don't want to run out of stuff two feet from the end.
The ST4, Gen 3 or C30P ready mixed concrete that we used for the foundations was rated 220kg/m of cement with a 20 mm aggregate. With a bucket and a shovel this means 5:1 ballast to cement. There is no standard volume for a bulk bag. Sydenhams says 10 square metres to a depth of 5 cm for one bag (handy for the floor area of my project). B&Q says a bulk bag is equivalent to 40 x 25 kg sacks. Either way that works out at two bulk bags plus about 16 bags of cement for my 5:1 mix.
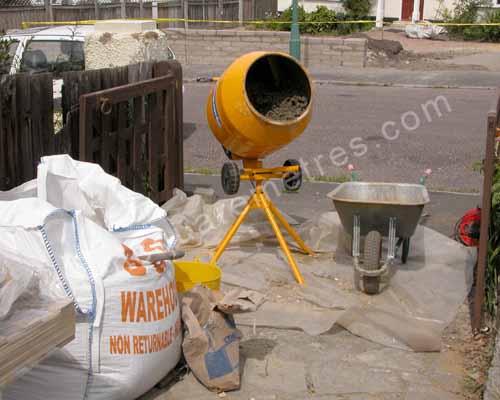 June 2008: Once everything is in the mixer it only takes about 2 minutes to make a barrow of concrete.
A concrete mixer is another of those large items that it is best to buy for your project. Like the breakers, they hold their value quite well and you can probably get quite a lot back on Ebay at the end. I bought a Belle Mini 130 new for £194 and have got on very well with it. It lived outside with a plastic sheet over it for quite a long time and still seemed to work. It's quite portable and mixes a large barrow's worth per load.
A mixer really does make light work of concreting compared to using a shovel. I found it best to find a bucket that was the right size to fill up my mixer with 5 and 1. It's also good to measure out your water to give you a better chance of keeping a good consistency. The bulk bags of aggregate tend to get wetter as you go down so you need less and less water as you go along. I read up on a few tips about using a mixer before I started and probably the most useful was the order in which to load your materials. You set the mixer going then put in about two thirds of the water. You then add three buckets of aggregate and your one bucket of cement. Finally add your last two of aggregate and use your last water to get the consistency right. Don't be in hurry to add water or you can end up with it too wet. The other tip that was useful is cleaning your mixer. Half a bucket of gravel and some water cleans your mixer really effectively.
As well as gathering all your materials together it is important to make sure that everything else is prepared before you start. For us, the block work would serve as shuttering. I just needed to fix some batons to the wall on the other side to support my wood for tamping and leveling. Make sure you have good ramps in place for your barrow and check the weather forecast. If there is chance of rain then you might need somethng at hand to cover your concrete.
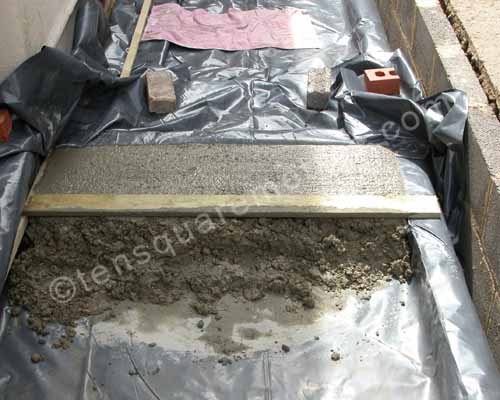 June 2008: The front section of the C20P concrete for the floor slab.
 June 2008: This section was left to go off so that I could barrow across this for the back section.
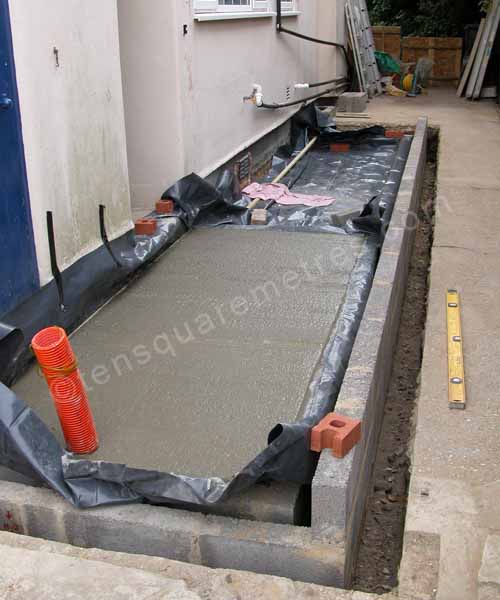
 June 2008: The completed floor slab.
If you have found this website useful please tweet / like / etc... and pass it on!
© 2010- tensquaremetres.com | Privacy | Search | Contact | About